

Call Us Today For A Free Consultation: 615-525-8464
Let’s discuss the ins and outs of hanging drywall, a task that may appear intimidating but can be accomplished with the right approach. Whether you’re handling a DIY project or considering professional remodel services in Nashville to transform your space, understanding the drywall installation process is valuable. From measuring and cutting the sheets to securing them with precision, following essential steps will help achieve a seamless finish. Proper preparation of your work area and knowing how to address common challenges can make a significant difference in the final results. This guide provides expert tips for maximizing efficiency and ensuring professional outcomes when tackling your next drywall project.
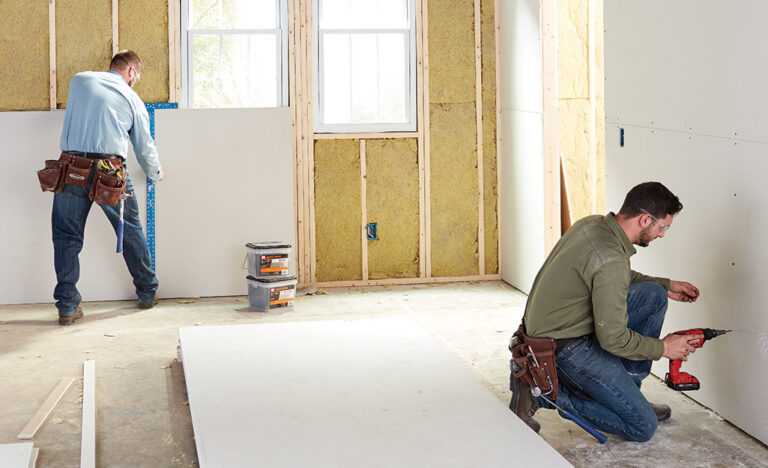
To begin hanging drywall efficiently, you must have the necessary tools and materials at hand. Essential tools include a cordless drill with a screwdriver bit for securing the drywall, a utility knife for precise cuts, a T-square for straight lines, a drywall saw for cutouts, and a tape measure for accurate dimensions. A drywall lift can greatly ease the process of positioning heavy sheets. For materials, you’ll need drywall screws to attach panels to studs, joint compound for finishing seams, and drywall tape to strengthen joints. With these items ready, you can proceed to measuring and cutting the drywall.
The process begins by carefully determining dimensions needed for each section of wall or ceiling. Using a tape measure and pencil, mark measurements on the drywall sheet. Always double-check these measurements before cutting to ensure accuracy. A T-square helps create straight lines for precise cuts. Score the front paper of the drywall with a utility knife, then snap the sheet along the scored line for a clean break. After snapping, cut through the back paper with the utility knife. Remember to wear safety gear like goggles and a dust mask during this process to protect yourself from particles.
Thoroughly preparing the work area is crucial before beginning drywall installation. Start by ensuring walls and ceiling are clean and free of debris. Remove any old drywall, nails, or protruding screws. Check for electrical wires or plumbing that might need redirection before proceeding. Adequate lighting in the work area guarantees accurate installation. Ensure you have sufficient space to move around comfortably and position drywall sheets effectively. Taking time to properly prepare creates a conducive environment for successful installation and helps prevent costly mistakes or delays.
After thorough preparation, begin hanging drywall sheets by positioning them onto walls or ceiling for installation. Start by measuring the surface dimensions, then carefully cut sheets to fit. Ensure panels are properly aligned and staggered to create a stronger finished surface. Use drywall screws to secure sheets to studs or ceiling joists, taking care not to overtighten and damage the material. Leave a small gap between sheets for expansion and use shims if needed to level the drywall. Working systematically from one end to the other helps maintain consistency and accuracy throughout the installation.
Complete the hanging process by applying joint compound to cover seams and screw indentations, then sand the surface smooth for a seamless finish. Start with a thin layer of joint compound over joints and screw holes using a taping knife. Press paper tape into wet compound along seams, ensuring it lies flat. Apply another thin compound layer over the tape, feathering edges to blend with the drywall. Once dry, lightly sand with fine-grit sandpaper for a smooth finish. Use a sanding block or pole sander for larger areas. Clean excess dust with a vacuum or damp cloth before priming and painting for professional-looking results.
Other Related Tips: